实现最后生还者中的椭球体环境遮蔽技术 agile Posted on Oct 2 2021 优秀博文 > 本文由 [简悦 SimpRead](http://ksria.com/simpread/) 转码, 原文地址 [zhuanlan.zhihu.com](https://zhuanlan.zhihu.com/p/365720602) 引言 -- 本文介绍了如何在 Unity URP 中实现 PS3 游戏最后生还者中使用的 “椭球体环境遮蔽” 技术。事实上该技术并没有一个统一的名称,例如《原神》中称其为 Dynamic Occlusion。笔者根据自己的理解暂定为 Ellipsoid Environment Occlusion (EEO)。本文仅仅是学习“Lighting technology of The Last of Us”[[1]](#ref_1) 这一 Speech 以及一些开源项目 [[2]](#ref_2) 的笔记,不代表在真实应用场景中落地的实现。 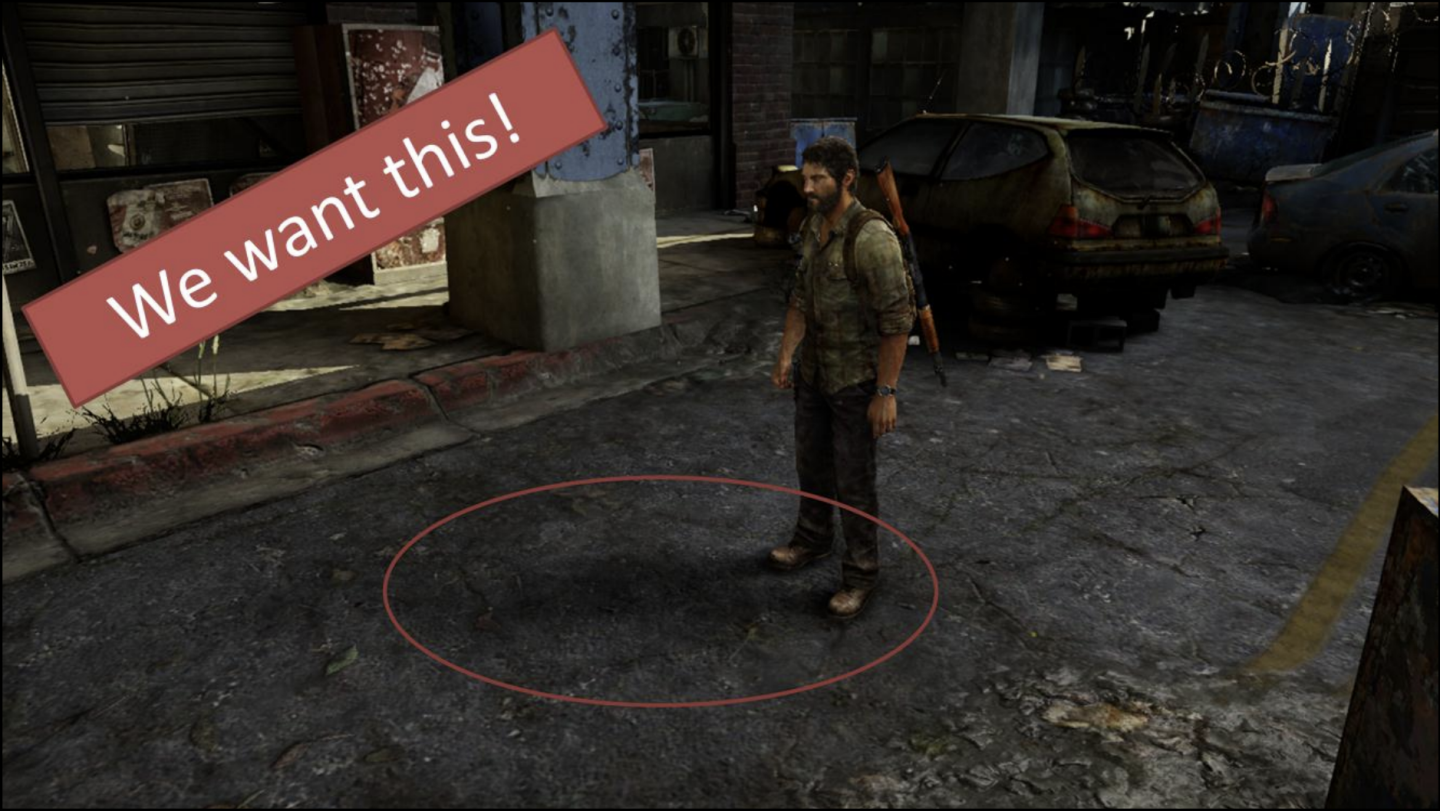 1. 概述 ----- 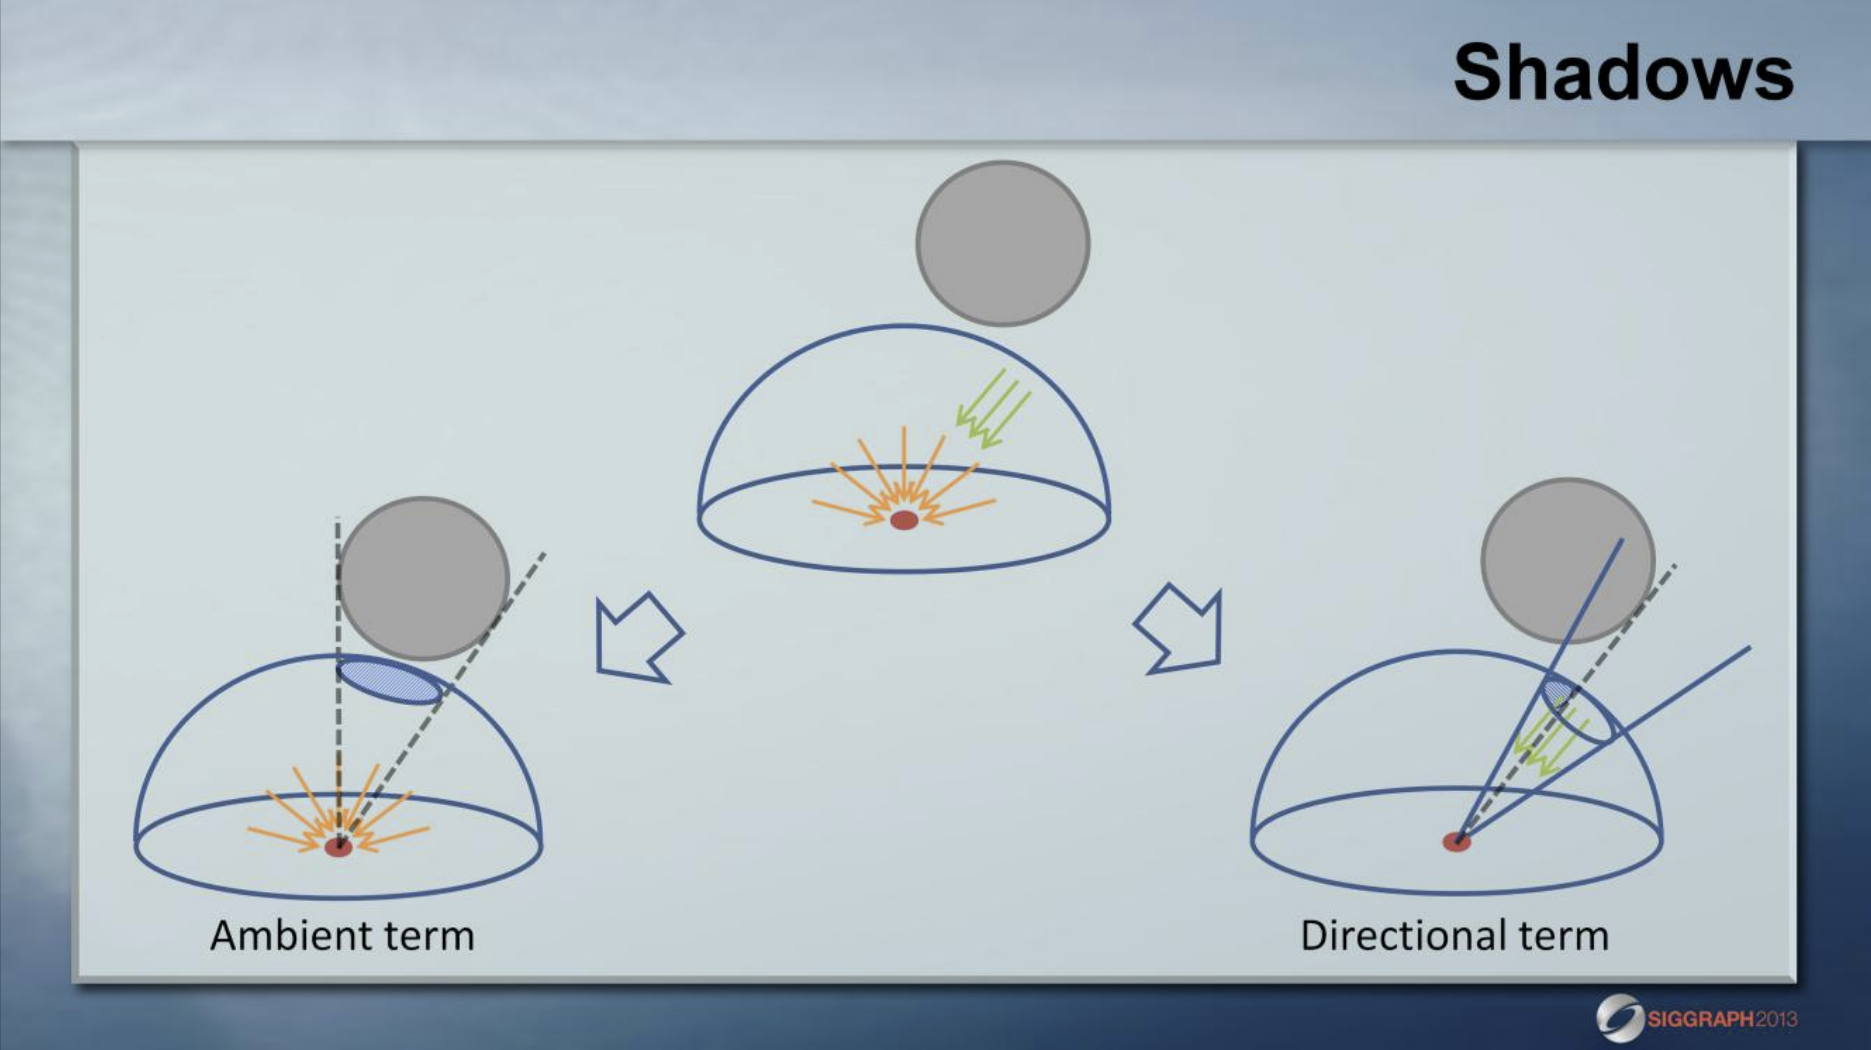 最后生还者使用了 Directional Lightmap 实现静态全局光照,而通过 EEO 实现了动态物体对静态物体 GI 的遮蔽。通过 Directional Lightmap,可以将物体表面一点的 GI 拆分为 Ambient 与 Directional 两项。实践中 EEO 将椭球体简化为球体进行计算,Ambient 项变为了求解球体在半球方向上的投影,而 Directional 项则变为了求解球体在圆锥上的投影。 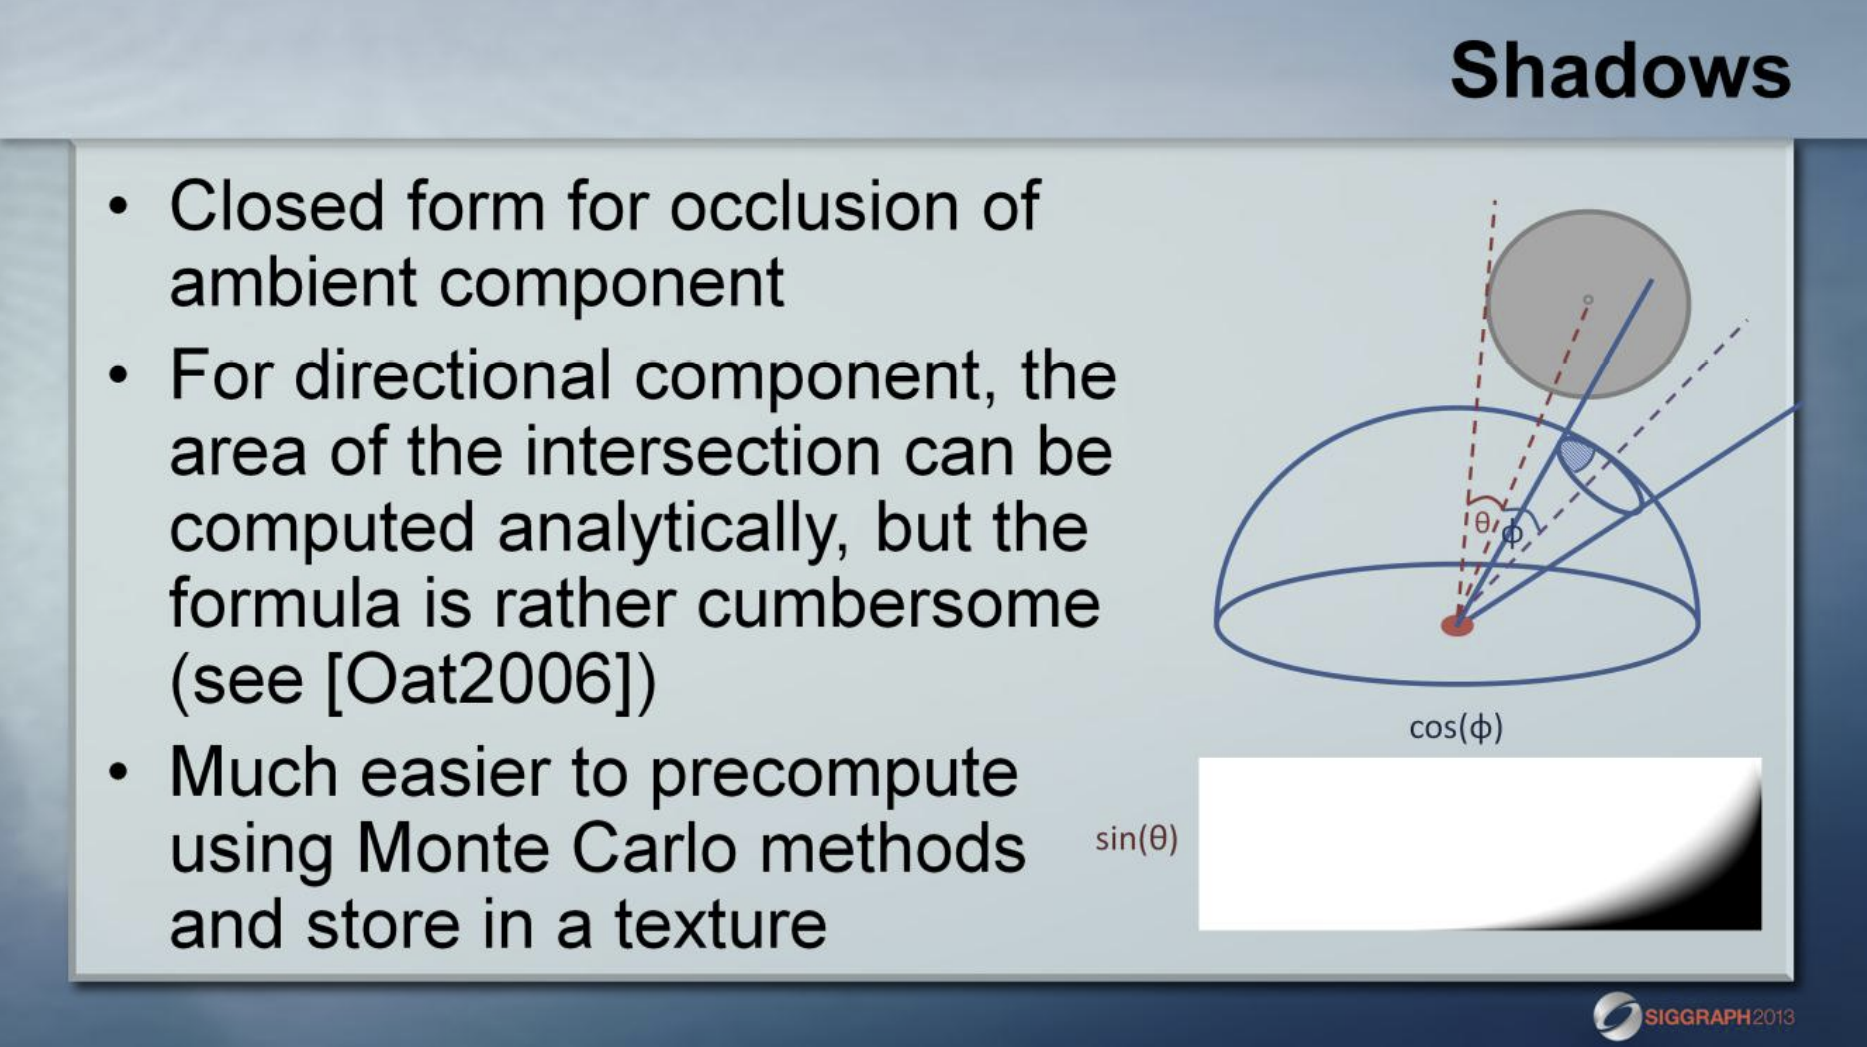 其中对于 Ambient 项使用闭式求解。而对 Directional 项则使用蒙特卡罗预计分 LUT,圆锥的方向由 Directional Lightmap 得到,LUT 的横轴代表过球心的射线与圆锥轴线的夹角的余弦值 cos(φ),纵轴代表与顶点为原点与球面相切的圆锥的顶角的一半的正弦值 sin(θ),之所以这样设计 LUT 是因为 cos(φ) 可以通过过球心的射线与圆锥轴线方向上的单位向量的点乘得到,sin(θ) 则是球体半径与球心到原点的距离的比值,一定程度上简化了实时下的计算量。 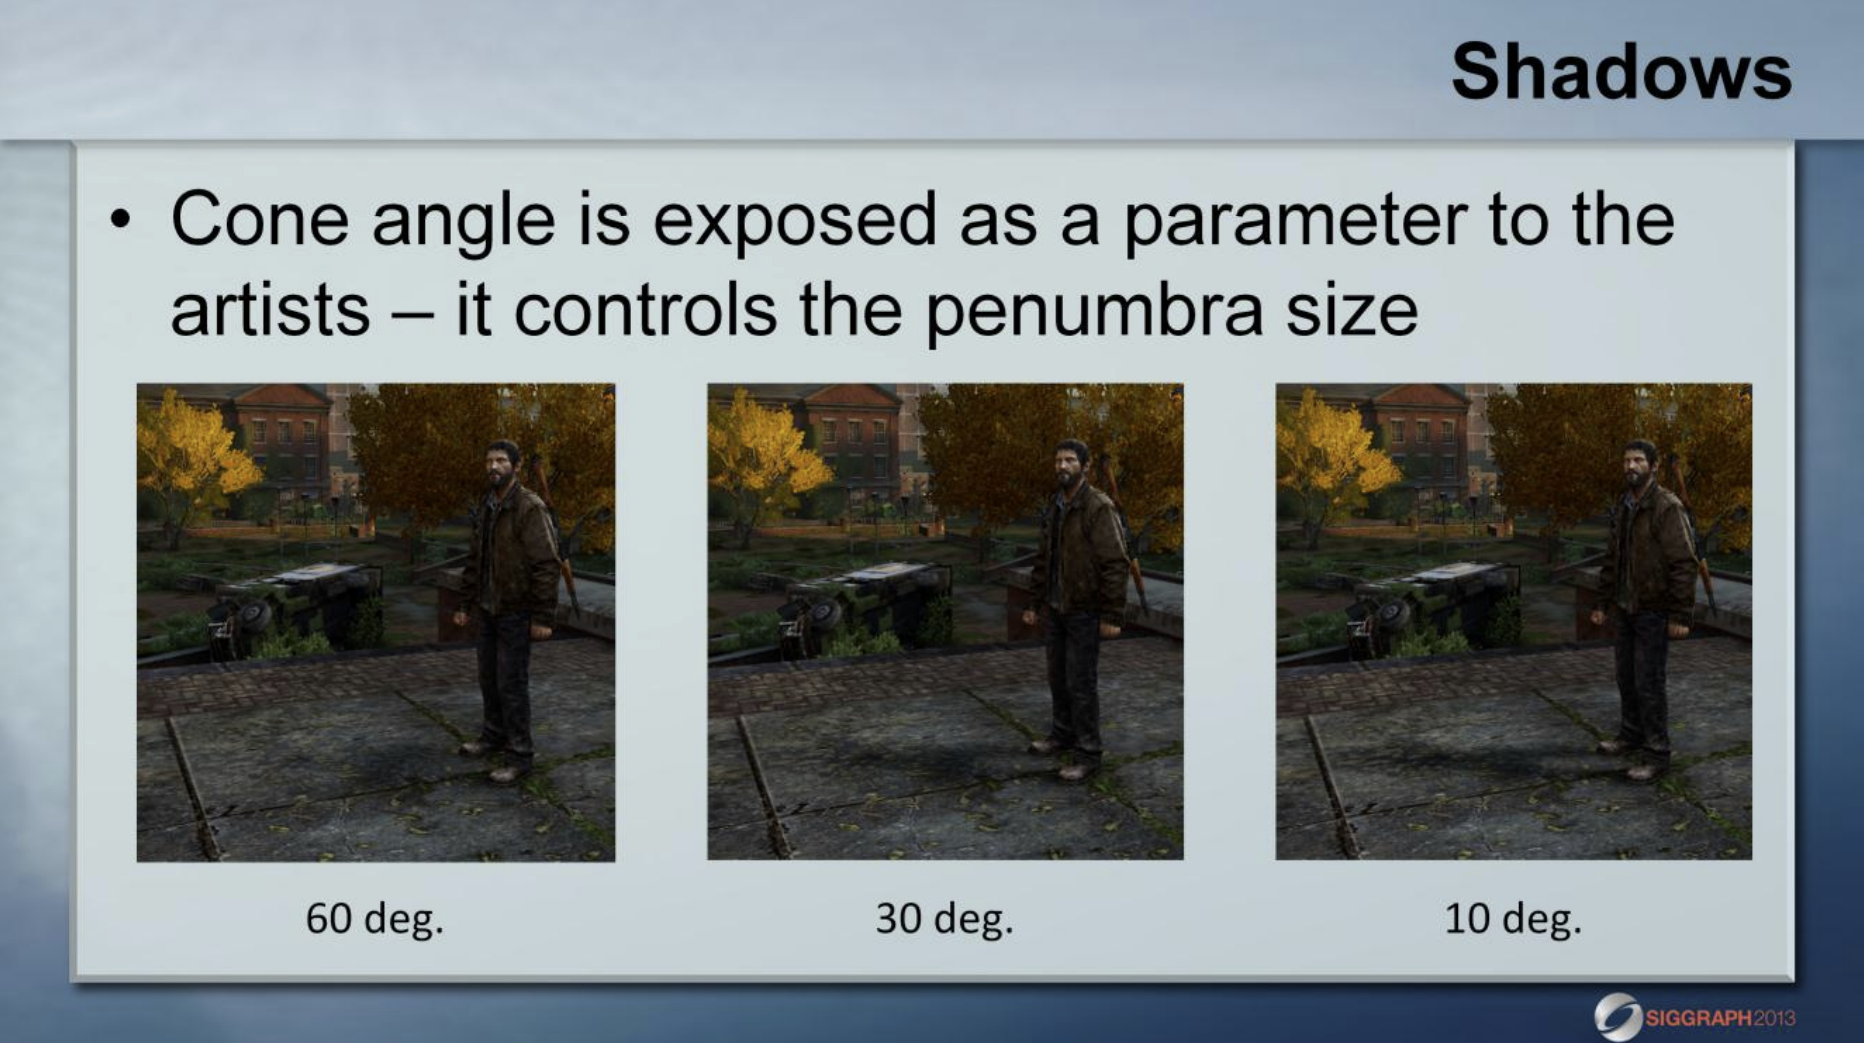 实践中圆锥的角度暴露出参数交由美术调整,以获得最好的效果。而对于不同角度的圆锥分别预积分的 LUT,可以编码到一张 Texture3D 中,在 GPU 上使用硬件插值。 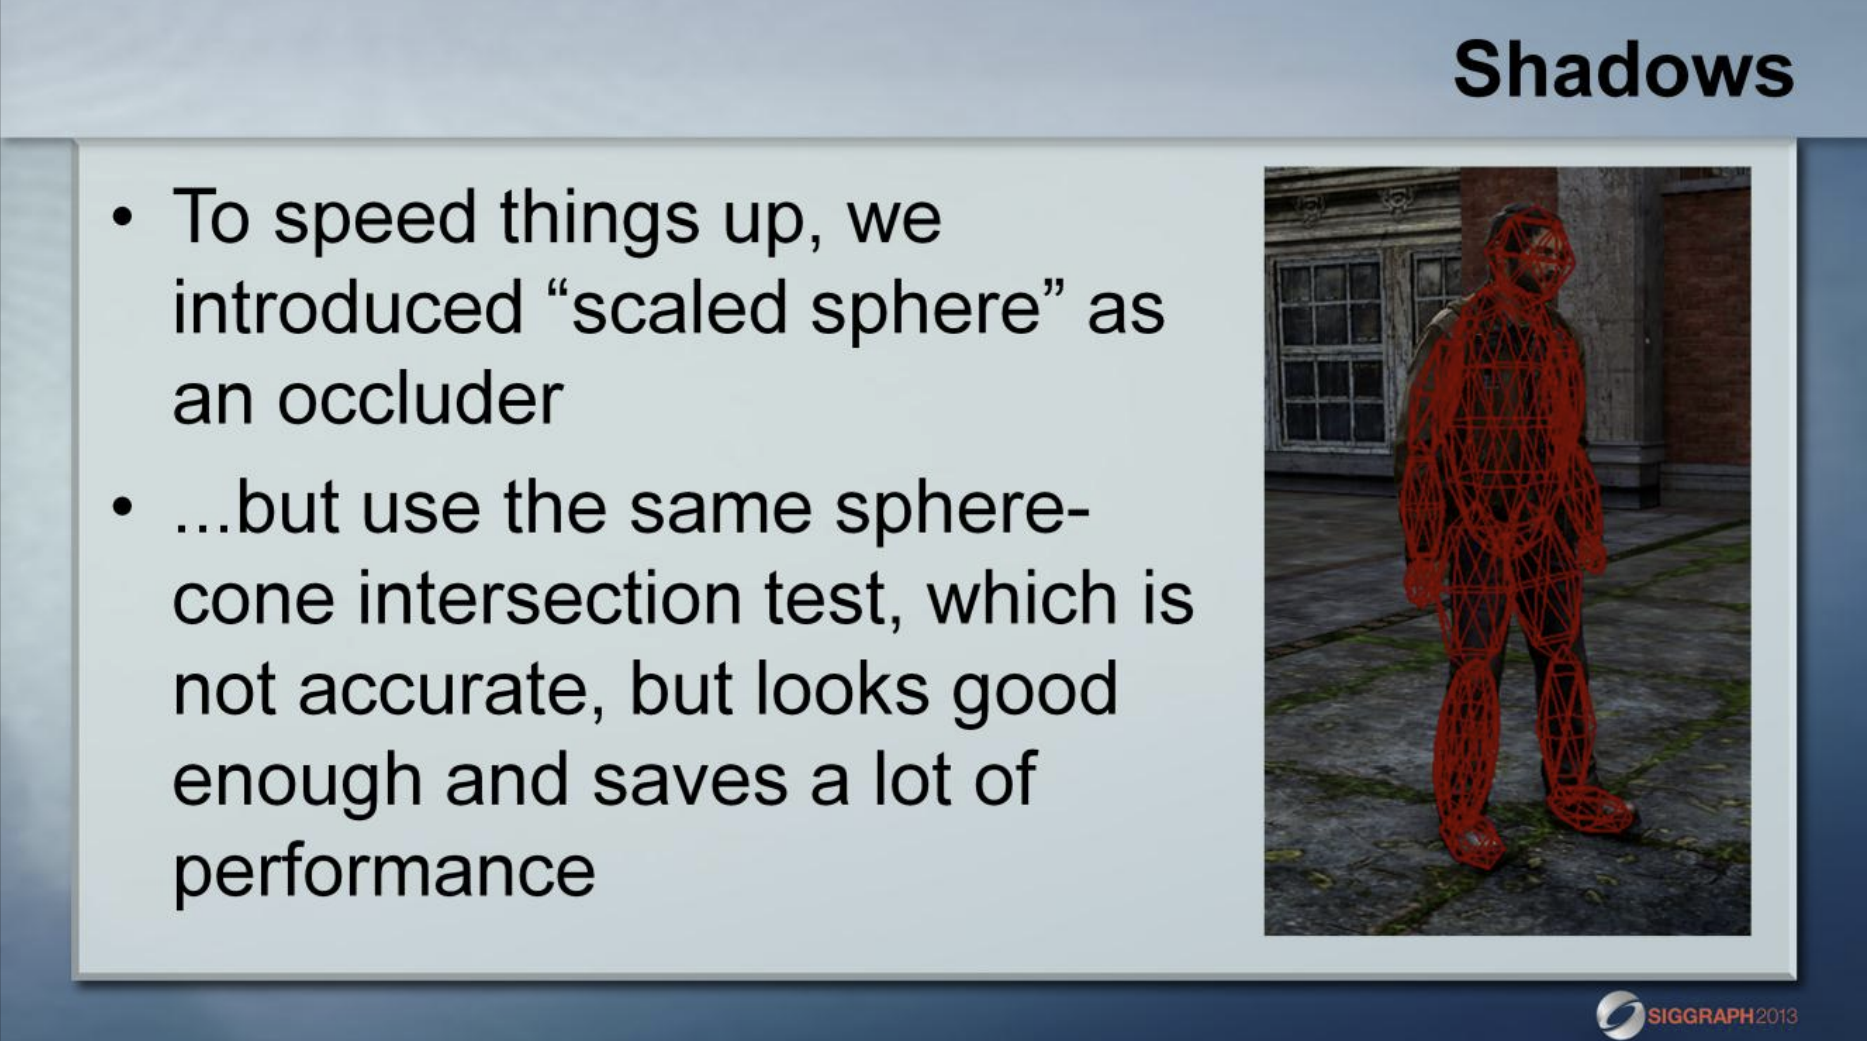 为了计算的简化,最后生还者假定所有的椭球体都是由球体在唯一一个轴上进行缩放得到,计算 Directional 项时将物体表面一点的位置变换到椭球体的局部空间中进行圆锥 - 球体求交,理论上此时圆锥应该被变换为椭圆锥,而实践中仅对圆锥的朝向进行变换而不变换圆锥的角度,也能得到非常好的效果。 EEO 使用了大量简化和预计算后其性能非常好,在当年的 PS3 上获得了超越时代的效果,其中也离不开美工的调整,不得不感叹图形学效果的开发真是同时考验了数学能力和美术直觉。 2. 实现 ----- 本文中的实现使用的是 Unity 2020.3LTS,URP 版本为 10.4.0,文中使用的角色模型购买自 [[3]](#ref_3) 第一步是对 LUT 的预积分,参考了 [[2]](#ref_2) 中的算法使用 Compute Shader 进行实现。首先圆锥方向上的随机采样: ``` float3 GenerateRandomConeRays( float coneAngle) { float3 RandomConeRays; float cosConeAngle = cos( 0.5f * coneAngle ); float cosTheta = NextFloat() * ( 1.0f - cosConeAngle ) + cosConeAngle; float sinTheta = sqrt( 1.0f - cosTheta * cosTheta ); float phi = PI * NextFloat() * 2.0f - 1.0f; float cosPhi = cos( phi ); float sinPhi = sin( phi ); RandomConeRays = normalize(float3(sinTheta * cosPhi, sinTheta * sinPhi, cosTheta)); return RandomConeRays; } ``` 其次是射线和球体的求教判断: ``` float Occlusion( float occluderAngleSin, float occluderToBeamAngleCos, float coneAngle) { float occluderToBeamAngleSin = sqrt(saturate( 1.0f - occluderToBeamAngleCos * occluderToBeamAngleCos)); float occluderAngleCos = sqrt(saturate(1.0f - occluderAngleSin * occluderAngleSin)); float3 occluderDir = normalize(float3( occluderToBeamAngleSin, 0.0f, occluderToBeamAngleCos)); uint hitNum = 0; float3 RandomConeRay; for ( uint iSample = 0; iSample < _SampleCount; ++iSample ) { RandomConeRay = GenerateRandomConeRays(coneAngle); if ( dot( occluderDir, RandomConeRay ) > occluderAngleCos ) { ++hitNum; } } return 1 - hitNum / (float) _SampleCount; } ``` 预积分得到的 3D LUT 如下: 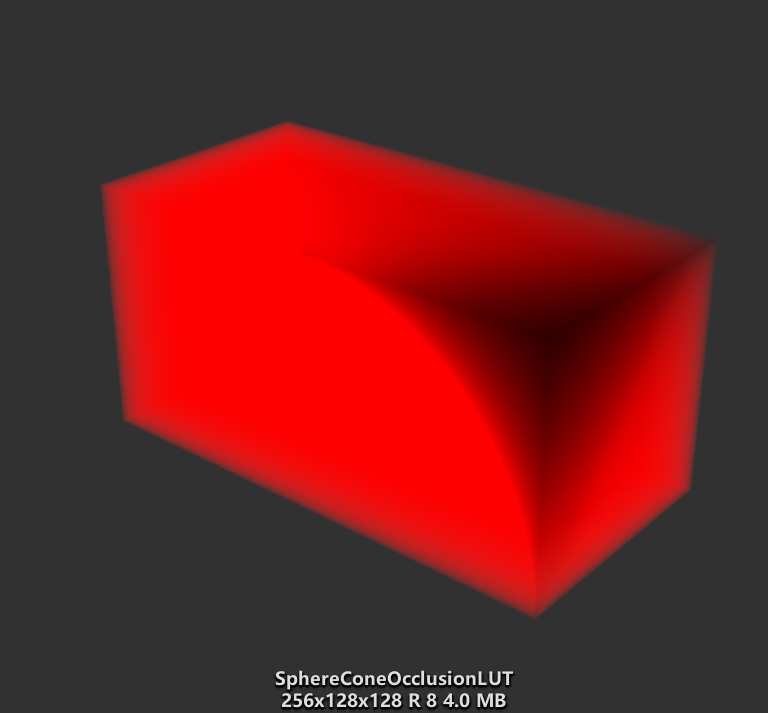 其中圆锥为 30 度时切片如下,《原神》中 Dynamic Occlusion 使用的 LUT 与其基本相同。  第二步是为角色绑定椭球体 Occluder 以及收集 Occluder 信息传递给 Shader 进行计算。本文直接将直径为 1 的球体缩放后附加到角色的骨架中: 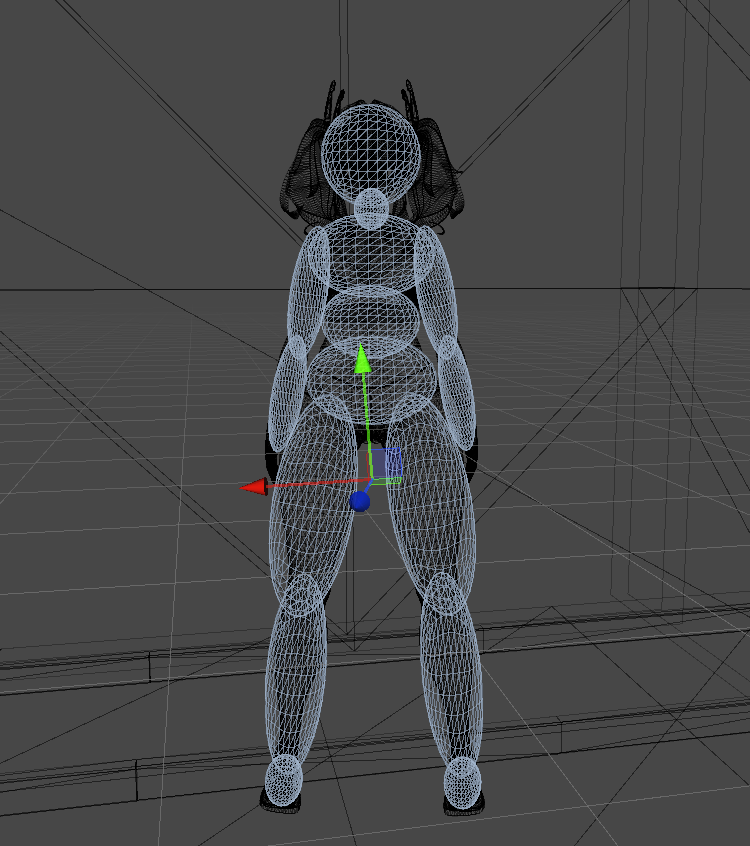 编写 OccluderManager 类,将球体逐个拖放到 Occluders 列表中: 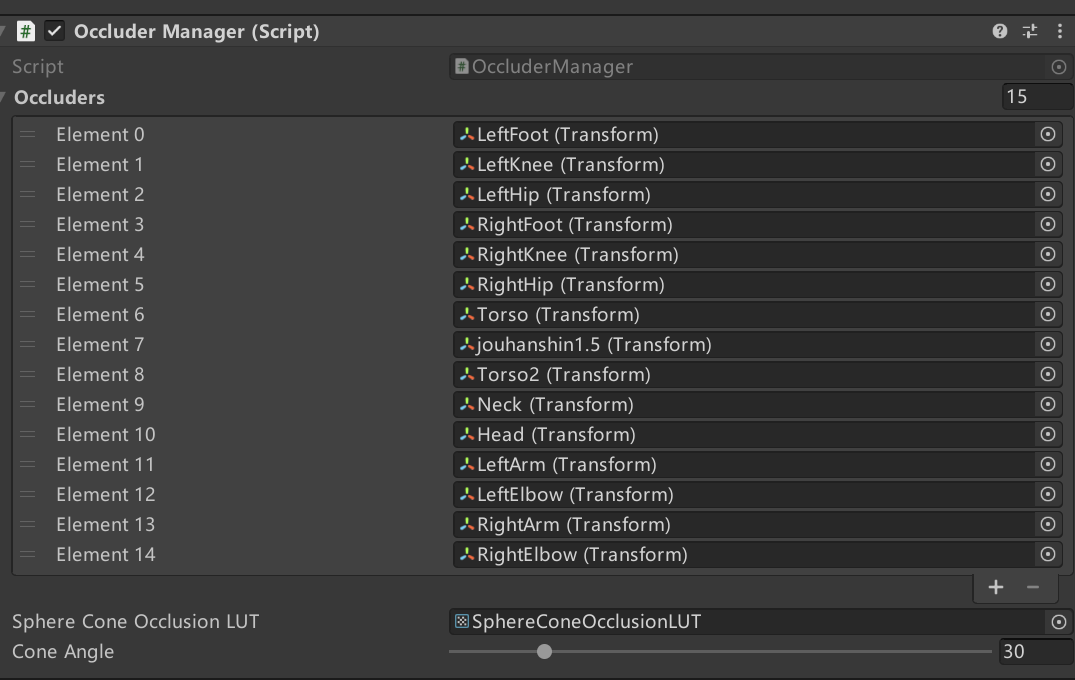 然后收集各个 Occluder 的 worldToLocalMatrix,通过 ComputeBuffer 传递给 Shader。 ``` public Transform[] m_Occluders; public float m_ConeAngle = 30; ... ComputeBuffer m_OccluderMatrices ; Matrix4x4[] matrices; static readonly int s_OccluderCountID = Shader.PropertyToID("_OccluderCount"); static readonly int s_OccluderMatricesID = Shader.PropertyToID("_OccluderMatrices"); static readonly int s_ConeAngleID = Shader.PropertyToID("_ConeAngle"); ... for (int i = 0; i < matrices.Length; ++i) { matrices[i] = m_Occluders[i].worldToLocalMatrix; } m_OccluderMatrices.SetData(matrices); Shader.SetGlobalBuffer(s_OccluderMatricesID, m_OccluderMatrices); Shader.SetGlobalInt(s_OccluderCountID, matrices.Length); Shader.SetGlobalFloat(s_ConeAngleID, m_ConeAngle); ... ``` 第三步需要为 URP 的 Lit Shader 添加相关的计算,首先是添加 Ambient 项的计算方法,本质上是计算球冠的立体角 [[4]](#ref_4) 与半球的立体角的比值: ``` float SphereOcclusion(float3 position) { float l = length(position); float sinTheta = min(0.5 / l, l / 0.5); float cosTheta = sqrt(1.0 - sinTheta * sinTheta); float res = (1 - cosTheta); return 1 - res; } ``` 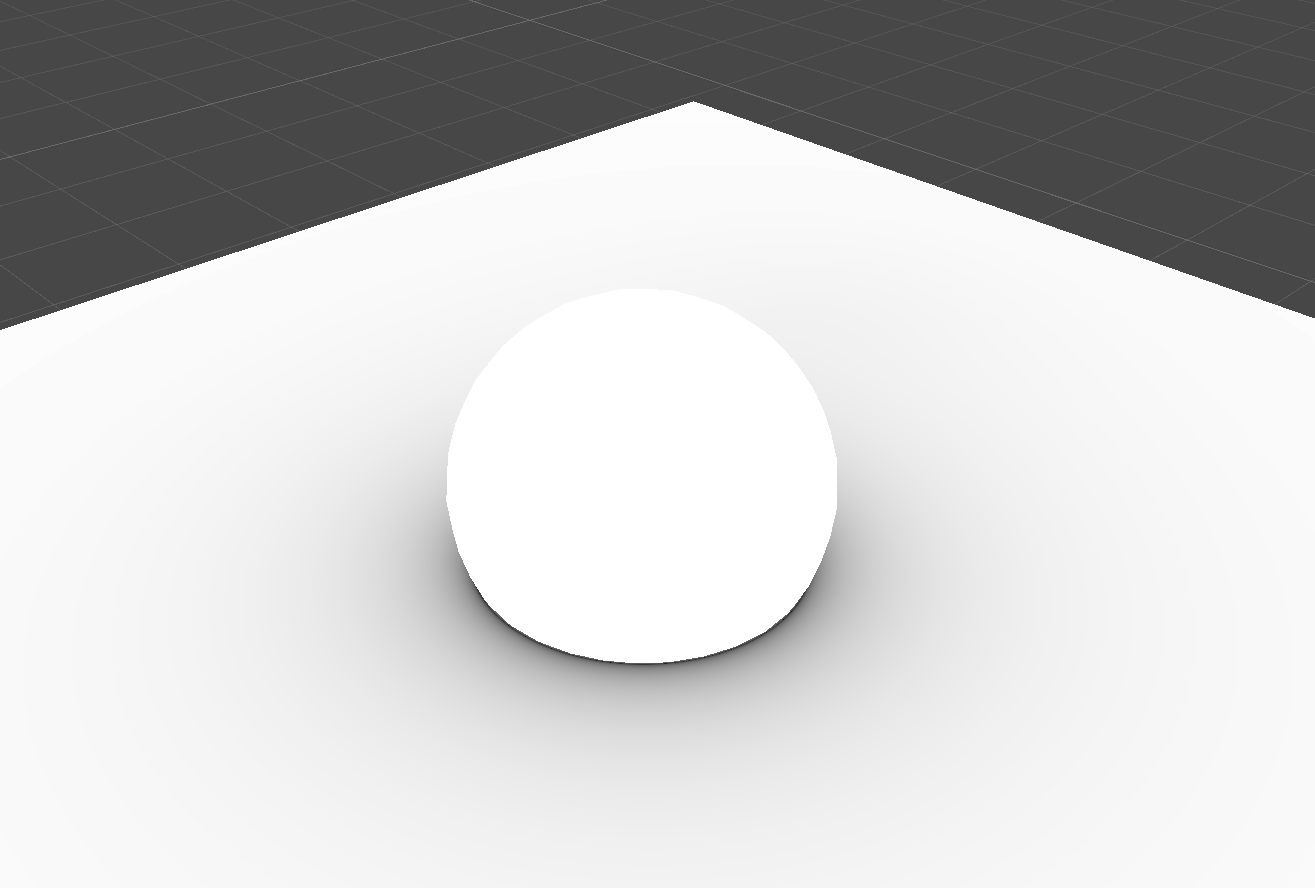 然后是 Directional 项的计算,图中取主光源方向为遮蔽方向: ``` float DirectionalOcclusion(float3 position, float3 direction) { float l = length(position); l = max(l, 1.0); float sinTheta = min(0.5 / l, 1.0); float cosPhi = dot(normalize(position), -normalize(direction)); float3 uvw = 0; uvw.x = cosPhi; uvw.y = sinTheta; uvw.z = _ConeAngle / 180.0; return _SphereConeOcclusionLUT.SampleLevel(sampler_SphereConeOcclusionLUT, uvw, 0); } ``` 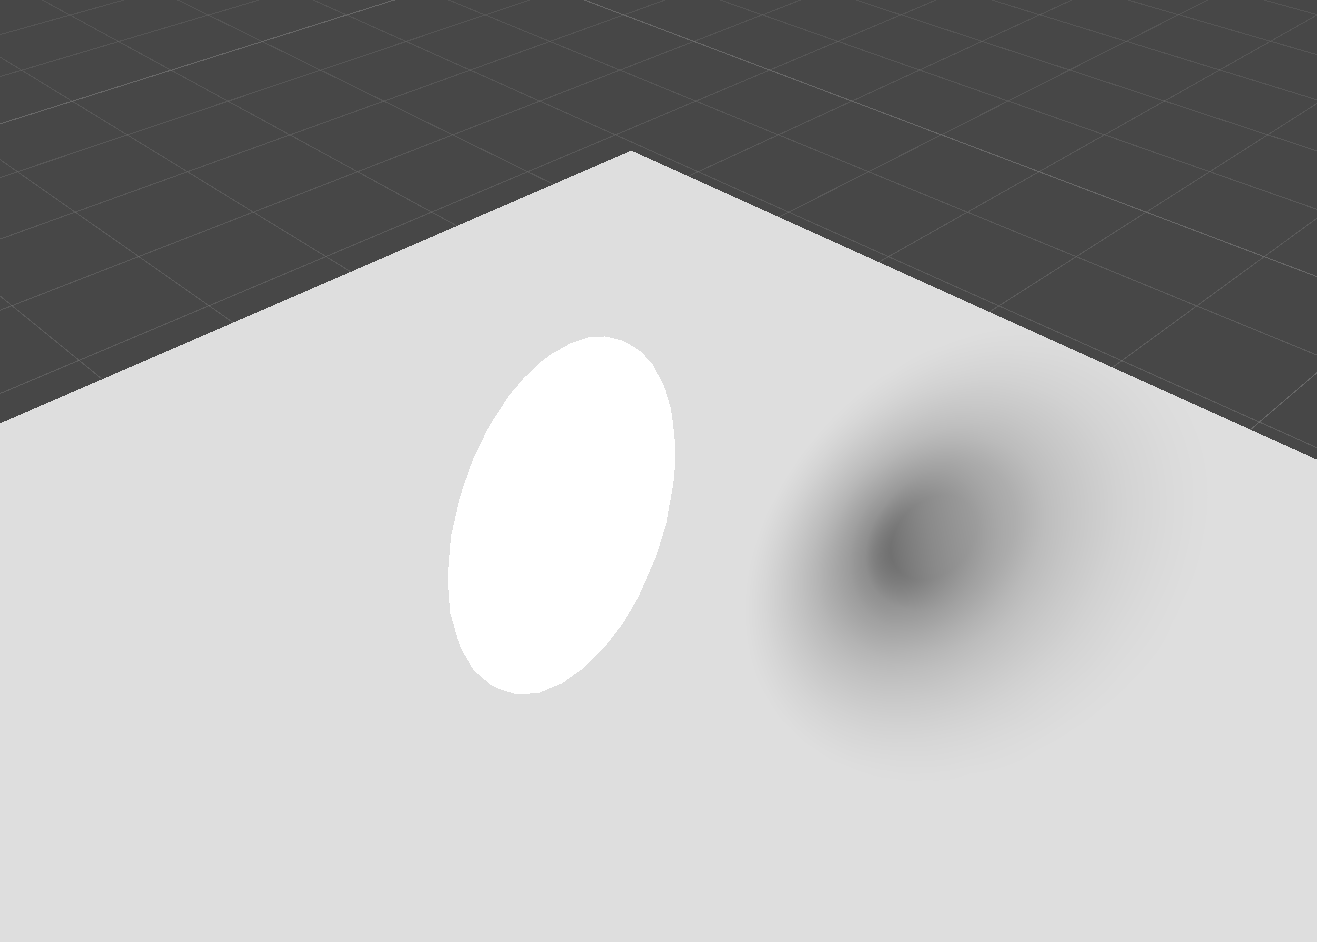 最后一步是修改 Directional Lightmap 的采样和解码算法,由于这一点基本靠美术直觉的 Trick,本文不再赘述。上文提到使用主光源作为遮蔽圆锥体的方向,原神中对于室外地面就是这么处理的,而对于墙面则使用法线方向,这是因为原神没有使用 Directional Lightmap,在 GI 计算时无法拿到 GI 的主方向 [[5]](#ref_5)。 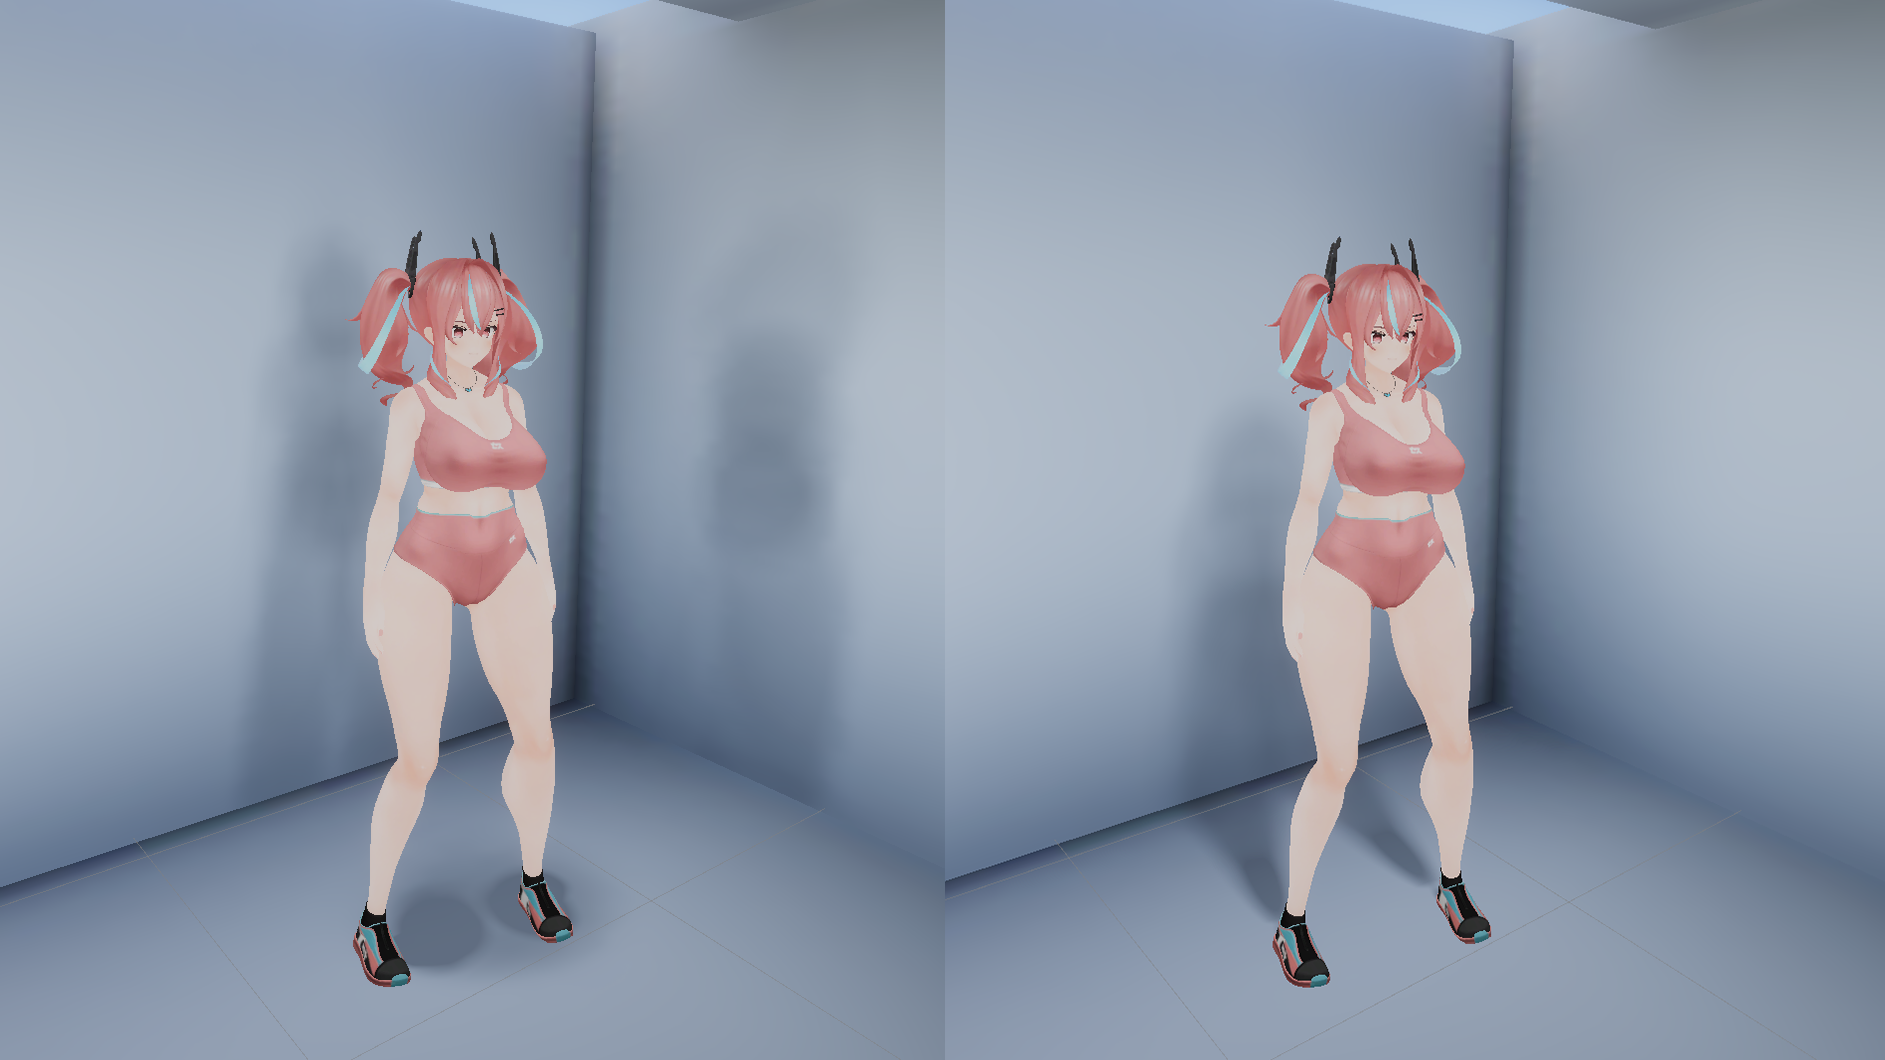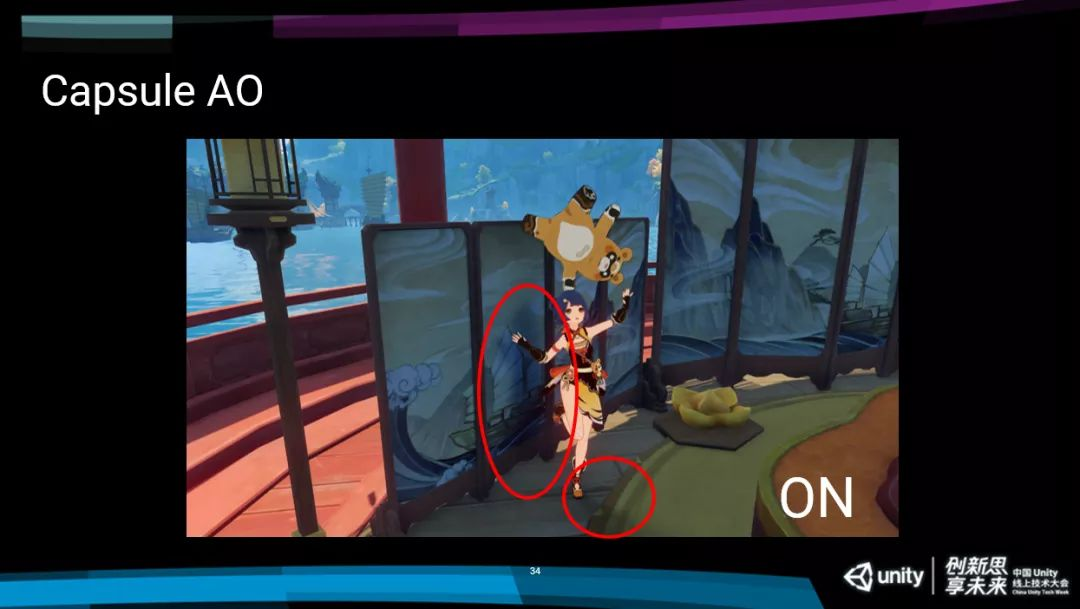 对于不同场景的环境光照,需要美术手动调整遮蔽圆锥的顶角大小,而实际上原神只使用了 30 度左右的 2D LUT 也能获得相对较好的效果。 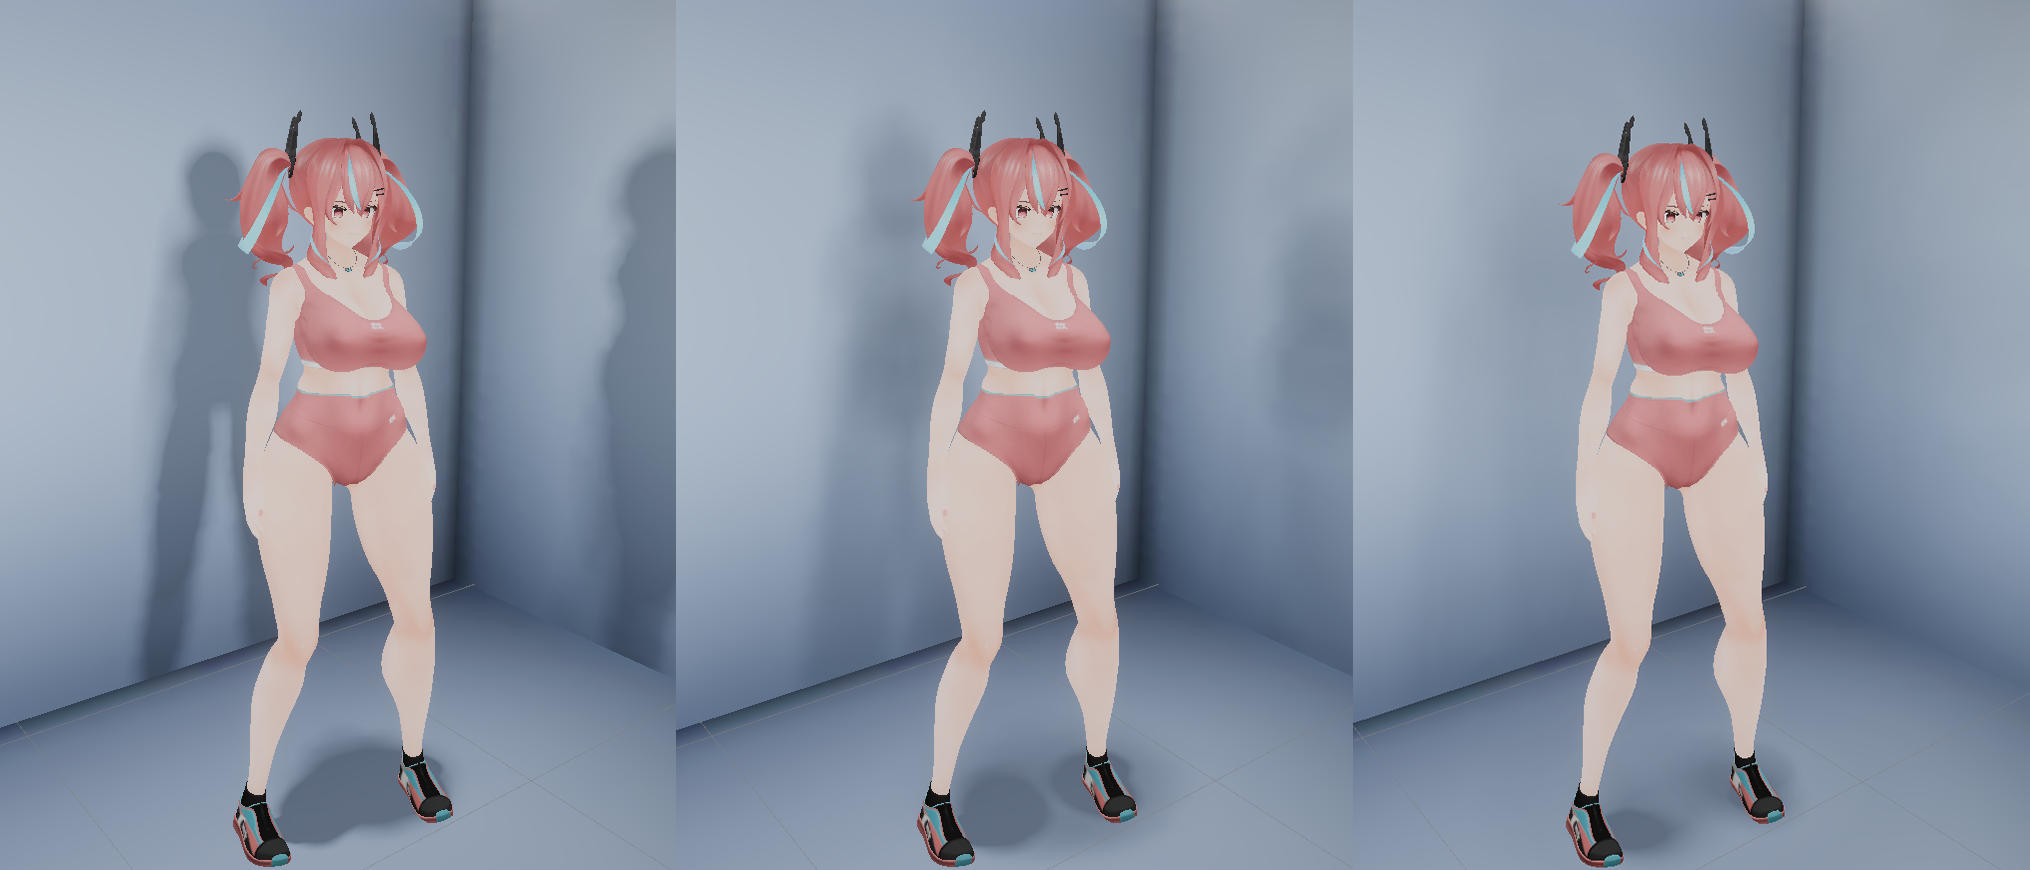 动态效果: 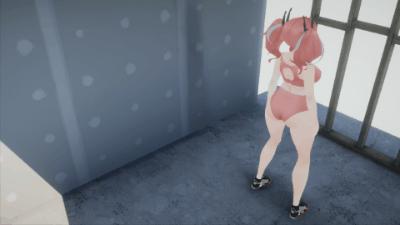 参考 -- 1. [^](#ref_1_0)[http://miciwan.com/SIGGRAPH2013/Lighting%20Technology%20of%20The%20Last%20Of%20Us.pdf](http://miciwan.com/SIGGRAPH2013/Lighting%20Technology%20of%20The%20Last%20Of%20Us.pdf) 2. ^[a](#ref_2_0)[b](#ref_2_1)[https://github.com/knarkowicz/ConeSphereOcclusionLUT](https://github.com/knarkowicz/ConeSphereOcclusionLUT) 3. [^](#ref_3_0)[https://misterpink.booth.pm/items/2881290](https://misterpink.booth.pm/items/2881290) 4. [^](#ref_4_0)[https://en.wikipedia.org/wiki/Solid_angle](https://en.wikipedia.org/wiki/Solid_angle) 5. [^](#ref_5_0)[https://zhuanlan.zhihu.com/p/316138540](https://zhuanlan.zhihu.com/p/316138540) 上海儿童疫苗接种时间表 纹理映射(Texture mapping)